Free Pattern Mouse Pokémon
Pikachu Pika Pi-CAL
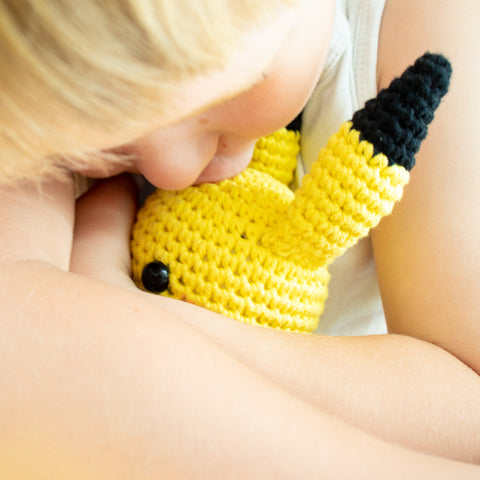
Alola pika lovers! Are you ready to become a real poket monster trainer? Great! So, grab your hook and let's catch some stitches to make your very own Pokemonster friend.
Free Pattern Mouse Pokémon
Pikachu Pika Pi-CAL
Alola pika lovers! Are you ready to become a real poket monster trainer? Great! So, grab your hook and let's catch some stitches to make your very own Pokemonster friend.
ch = chain stitch
dec = decrease (crochet together 2 sts with 1 sc)
-flo = work stitch as indicated through front loop only, example: sc-flo, dec-flo
inc = increase (2 sc into the same stitch)
rnd(s) = round(s)
sc = single crochet stitch
slst = slip stitch
st(s) = stitch(es)
[…] ...x = repeat instructions in brackets as a sequence as often as written after the closing bracket, example: [...] 5x
°…° = work the instructions between °...° all into same stitch or spot
(…) = total number of stitches after row or rnd
It doesn't matter what yarn weight you use for this pattern. Just make sure to adjust the hook size, as well as the size of the safety eyes if choosing a different yarn than the recommended yarn.
Here's what I used:
Worsted weight yarn - size 3
Scheepjes Cahlista
100% double gassed cotton, 50g = 85 m, 10x10 cm (4x4 inch) = 19 sts x 23 rows⠀
⠀
yellow - 280 Lemon ~ 40g⠀
black - 110 Jet Black ~ 5g⠀
brown - 507 Chocolate ~ 2g⠀
red - 390 Poppy Rose ~ 2g⠀
Alternative Yarn:
Yarn and Colors Super Must Have,
Schachenmeyr Catania Grande
3.25 mm Crochet Hook (or – depending on how tight you crochet – 3 mm, or 3.5 mm)⠀
⠀
black yarn, or embroidery floss
2 black safety toy eyes Ø 10 mm
tapestry needle, pins, scissor, soft stuffing
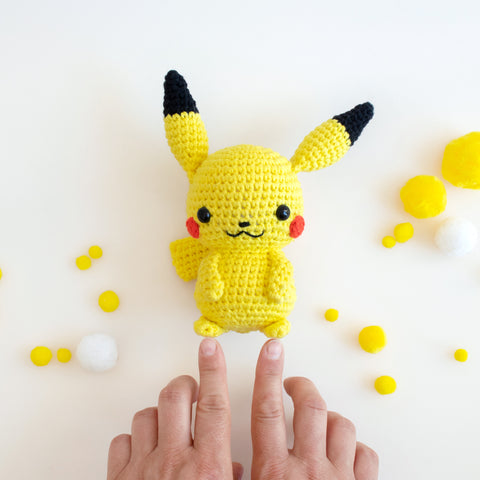
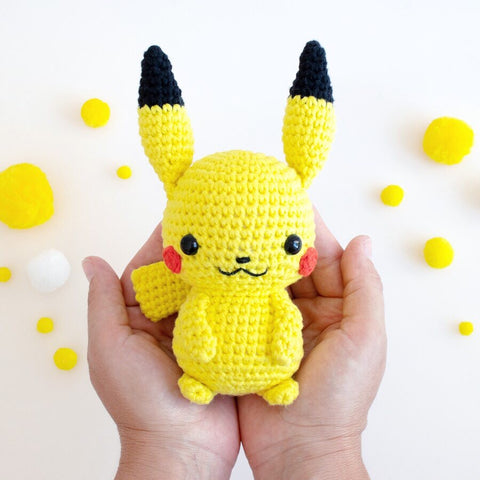
Using the recommended materials Pikachu turns out a height of approx. 15 cm (6 inch).
Using heavier or lighter yarn weight and another hook size, Pikachu will turn out bigger or smaller. If you use a different yarn weight, please adjust the size of the safety eyes!
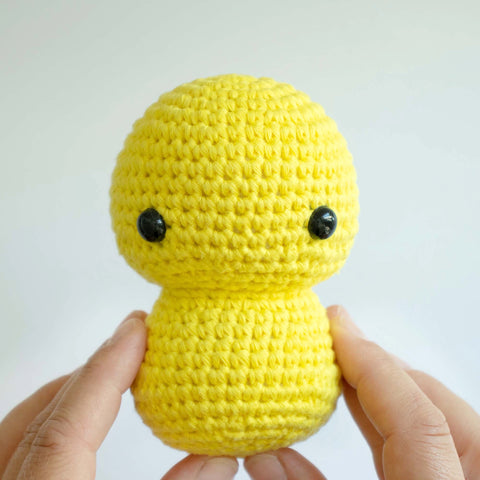
Head
Using yellow, make a magic loop.
01. sc 6 into the magic loop (6)
02. [inc] 6x (12)
03. [sc 1, inc] 6x (18)
04. sc 1, inc, [sc 2, inc] 5x, sc 1 (24)
05. [sc 3, inc] 6x (30)
06. sc 2, inc, [sc 4, inc] 5x, sc 2 (36)
07. [sc 5, inc] 6x (42)
08.-12. sc 42 (5 rnds)
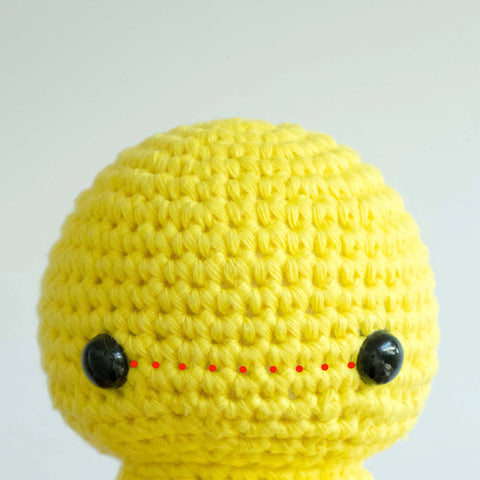
In rnd 12, mark the 4th and the 14th stitch with a little piece of yarn or a glass head pin. Here’s where you’ll attach the eyes later.
13. [inc] 3x, sc 11, [inc] 3x, sc 12, inc, sc 12 (49)
14. [dec, sc 5] 7x (42)
15. sc 2, dec, [sc 4, dec] 6x, sc 2 (35)
16. [dec, sc 3] 7x (28)
17. sc 1, dec, [sc 2, dec] 6x, sc 1 (21)
18. slst 21
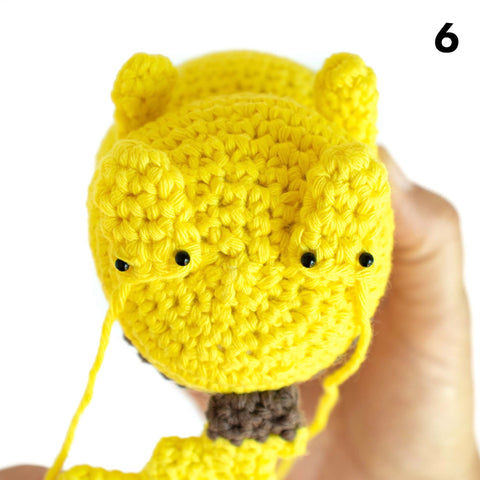
Attach the eyes between rounds 12 and 13 with a distance of 9 stitches between each eye (photo above). Stuff the head firmly.
Don’t break the yarn!
Body
19. sc 2, inc, sc 7, [inc, sc 3] 2x, inc, sc 2 (25)
20. sc 2, inc, [sc 4, inc] 4x, sc 2 (30)
21. sc 30
22. [sc 5, inc] 5x (35)
23.-24. sc 35 (2 rnds)
25. sc 3, [°sc 3°] 2x, sc 10, [°sc 3°] 2x, sc 10, inc, sc 7 (44)
26. sc 44
27. sc 2, dec, sc 3, dec, sc 10, dec, sc 3, dec, sc 18 (40)
28. sc 4, dec, sc 5, dec, sc 5, dec, sc 11, dec, sc 7 (36)
29. sc 2, dec, [sc 4, dec] 5x, sc 2 (30)
30. sc 6, [dec] 3x, sc 9, [dec] 3x, sc 3 (24)
Stuff the body firmly.
31. sc 1, dec, [sc 2, dec] 5x, sc 1 (18)
32. [dec, sc 1] 6x (12)
33. [dec] 6x (6)
Stuff body a little bit more. Then, close the remaining stitches.
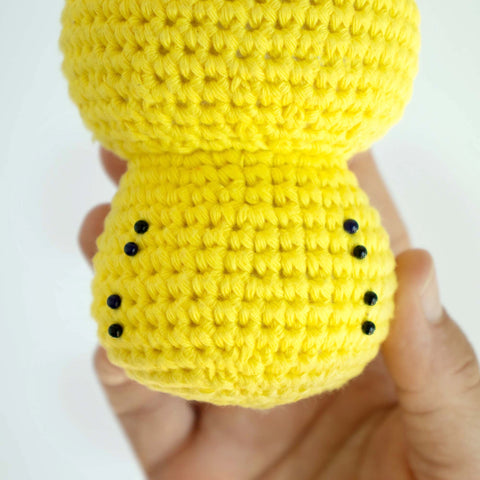

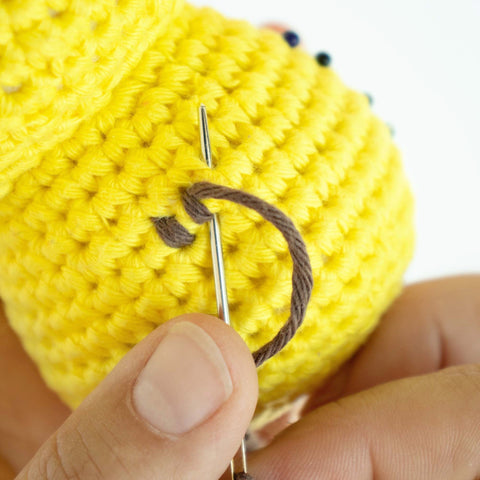

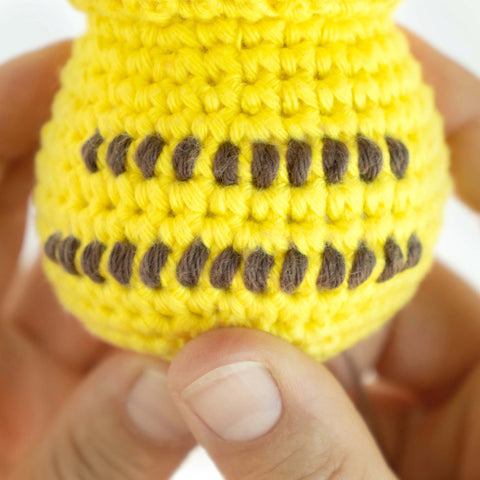
Stripes
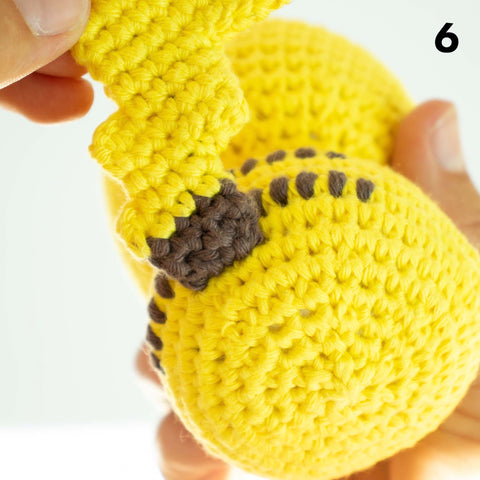
On the backside of Pikachu’s body, embroider 2 brown stripes.
The upper stripe is worked into 10 stitches of round 23 (5th round of the body counted top down) and the second brown detail is embroidered into 13 stitches of round 26 (8th round of the body, photos above).
Zig-Zag Tail
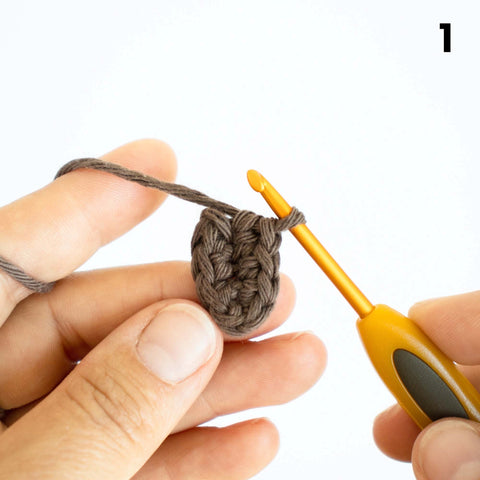
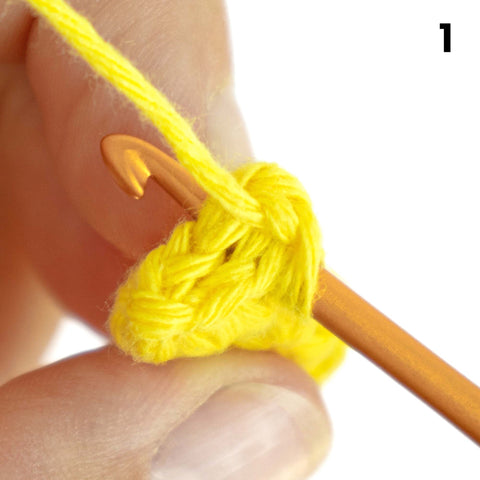
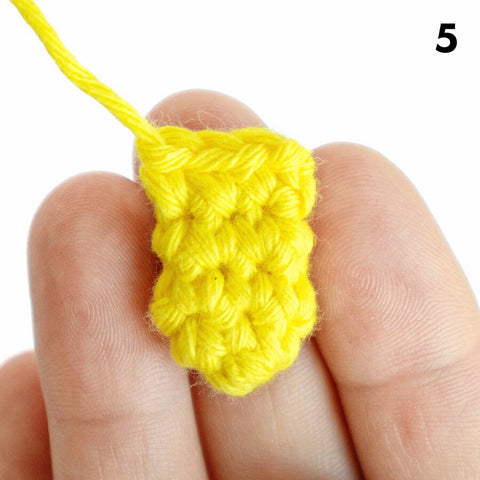
01. Using brown, make a foundation chain of 5 ch. Starting in the second chain from hook: sc 3, inc into last stitch, continue along the other side of the chain: sc 3 (photo 1 below) (8)
02. sc 8
03. Change to yellow, sc 8
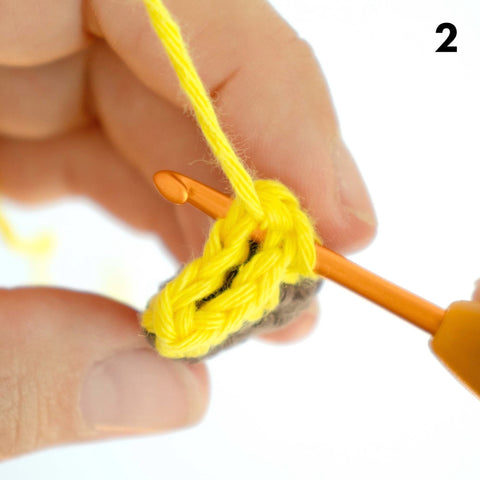
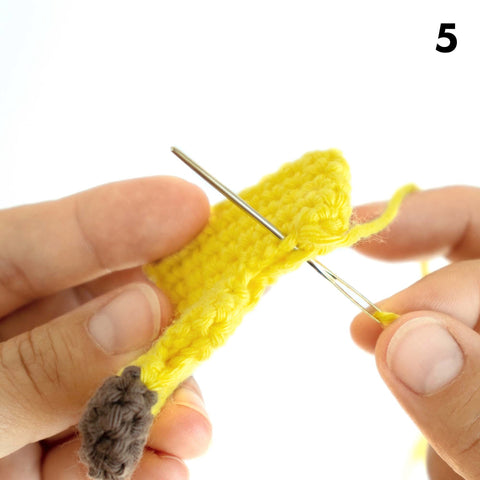
04. sc 1, ch 1.
Fold, go through both layers at once, sc together the first pair of stitches (= this is the next st and the st before the ch, photo 2 below).
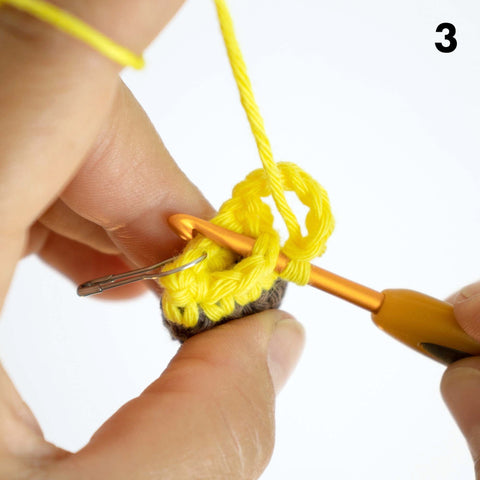
Continue working in one layer only: sc 1 (mark this stitch as first stitch of the round), sc 2, ch 6, sc 1 into the next st ( photo 3 below), sc 2 (12)
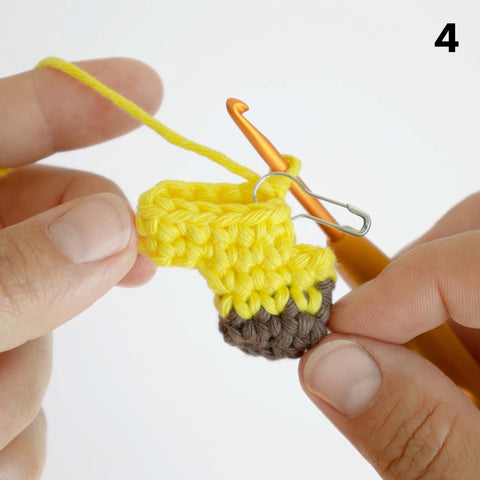
05. sc 3, sc-flo 6 along the chain, sc 3 (photo 4below)
06. sc 12
07. ch 1. Fold, go through both layers at once : sc 2.
Continue working in one layer only: sc 4 (place marker in the first stitch), ch 10, sc 4 (18)
08. sc 4, sc-flo 10, sc 4
09.-11. sc 18 (3 rnds)
12. sc 1, ch 1, leaving remaining stitches unworked.
Fold, go through both layers at once: sc 9
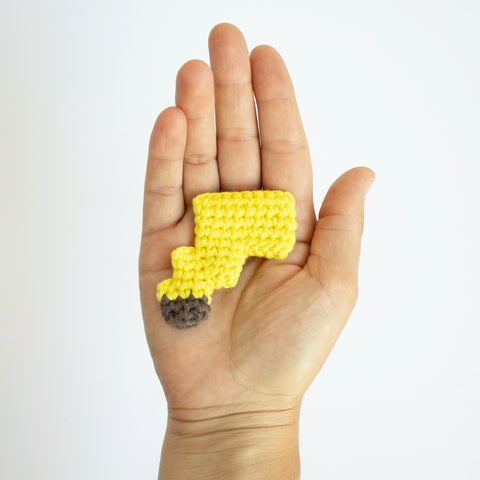
Cut the yarn with a long rest. Use the yarn tail to close the bottom of the rectangles – sewing together the corresponding stitches on both layers (photo 5 below).
Using brown to sew the tail onto Pikachu‘s back – between rounds 5 and 6, counted from the bottom (photo 6 below).
Arms (make 2)
Using yellow, make a magic loop.
01. sc 6 in magic loop (6)
02.-06. sc 6 (5 rnds)
Ch 1, close the open end flat with a row of sc stitches:
Fold, so that 3 stitches line each other in 2 layers.
Go through both layers at once (photo 1 below): sc 3 (3)
Cut the yarn with a long rest to sew the arms onto the body.
Sew Pikachu’s arms onto the body – with the top corner between rnds 1 and 2 and the bottom corner between rnds 3 and 4 (photos 3+4 below).
Feet (make 2)
Using yellow, make a magic loop.
01. sc 6 in magic loop (6)
02.-04. sc 6 (3 rnds)
Ch 1, close the open end flat with a row of sc stitches:
Fold, so that 3 stitches line each other in 2 layers.
Go through both layers at once: sc 3 (3)
Cut the yarn with a long rest to sew the feet onto the body.
With the toes slightly pointing outwards, sew Pikachu’s feet onto the bottom of the body – between rnds 3 and 4, counted from the bottom (photo 6 below)


Ears (make 2)
Using black, make a magic loop.
01. sc 6 into the magic loop (6)
02.-03. sc 6 (2 rnds)
04. [sc 1, inc] 3x (9)
05. sc 9
06. sc 1, inc, [sc 2, inc] 2x, sc 1 (12)
07. sc 12
08. Change to yellow, [sc 3, inc] 3x (15)
09.-12. sc 15 (4 rnds)
13. [dec, sc 3] 3x (12)
14. sc 12
15. sc 1, dec, [sc 2, dec] 2x, sc 1 (9)
Stuff the ear loosely. Then, close the open end flat with a row of sc stitches: Fold, so that 4 stitches line each other in 2 layers. Go through both layers at once: sc 4.
Cut the yarn with a long rest to sew the ear onto the head. Using the yellow yarn tail, sew Pikachu’s ears onto its head - between rnds 7 and 8, counted from then top (photo 1 below).
Cheeks (make 2)
Using red, sc 6 into a magic loop.
Close the rnd invisibly into the top of the 1st stitch. Cut the yarn with a long rest to sew the cheeks onto Pikachu’s face (photo 2 below).


Face Nose & Mouth
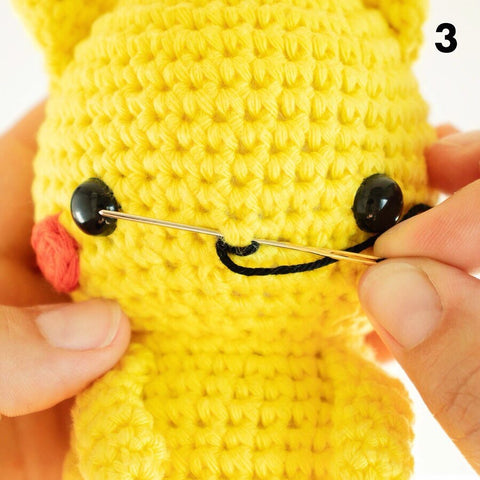
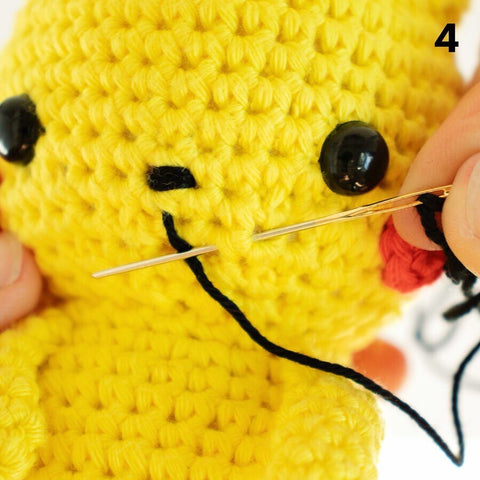
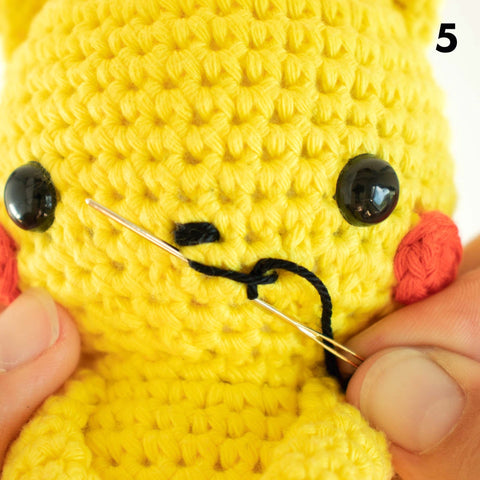
With thin black yarn or embroidery floss, embroider a little nose in the middle of Pikachu’s face - between rounds 13 and 14 (= this is one round below the eyes, photo 3). Then, embroider a little mouth like shown in (photos 3-7).
© 2023 Lalylala Crochet . Lydia Tresselt . All rights reserved.
Even though this pattern is fan art no part of this pattern may be published, resold, reproduced (in any form or by any means, electronic or mechanical, by photocopying, recording or otherwise), shared, translated or altered without prior permission in writing from the author.
The crochet design and pattern are copyright and must not be reproduced for resale! You cannot sell finished toys made from this pattern. For your personal use (non-profit) or for charity purposes you are permitted to make as many items from this pattern as you like.

Happy Crocheting!